WhatsApp Image 2026-01-08 at 12.39.09 PM

COPD Exacerbations: 6 Common Treatment Mistakes That Prolong Hospital Stays

Most COPD exacerbations don’t go wrong because we don’t know what to do.

They go wrong because of small, repeated decisions that quietly worsen outcomes.

If you’ve spent enough time on the wards, you’ve seen it: a patient who should improve stalls, deteriorates, or bounces back within weeks. Not because COPD is untreatable—but because of how we treat it.

Here are six common mistakes I still see in hospitalized COPD exacerbations.


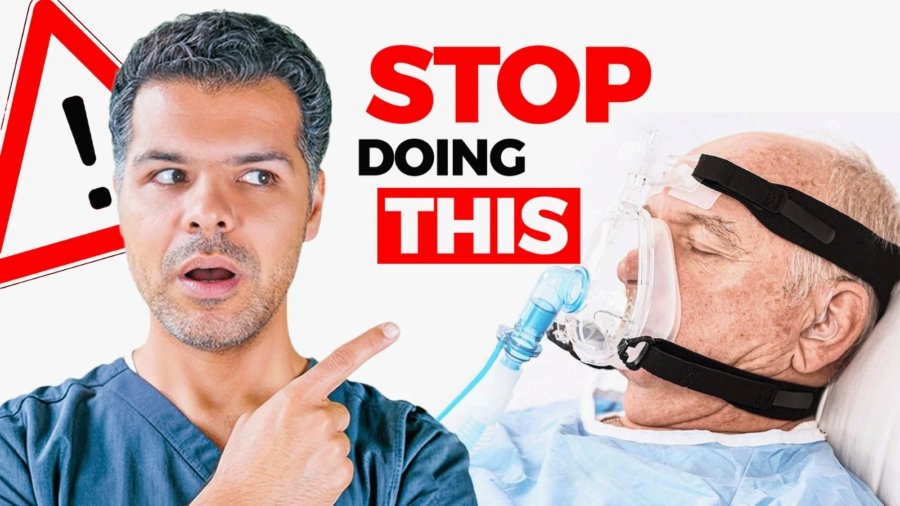
1. Giving Too Much Oxygen

Oxygen is often treated as benign. It isn’t.

In patients with COPD, aggressive or non-titrated oxygen can worsen hypercapnia, precipitate respiratory acidosis, and increase the risk of intubation. The reflex to normalize oxygen saturation is understandable—but harmful.

For most COPD exacerbations, the goal is not “normal.”
The target is usually 88–92%.

When saturations climb higher than that, outcomes often get worse, not better.


2. Underusing Bronchodilators Early

Bronchodilators are the foundation of treatment—yet they’re often underutilized when they matter most.

Delayed initiation, wide spacing of treatments, or relying on PRN dosing in a visibly tight patient slows recovery. If airflow obstruction isn’t relieved early, everything else works less effectively.

Frequent short-acting bronchodilators early in the course, with prompt addition of anticholinergics, can significantly change the trajectory of the hospitalization.

This step is simple—and too often missed.

Please don’t hold the patient’s home LABA and LAMA inhalers during the exacerbation, as their benefits persist during acute exacerbations.


3. Prolonged or Excessive Steroid Therapy

More steroids do not equal better outcomes.

Despite strong evidence, patients are still commonly kept on high-dose IV steroids for extended periods. In reality, short courses work just as well.

For most patients, prednisone 40 mg daily for five days is sufficient. Oral therapy is preferred, and a taper isn’t needed for short courses.

Longer or higher-dose regimens only increase hyperglycemia, infection risk, delirium, and length of stay—without added benefit.


4. Reflexive Antibiotic Use

Not every COPD exacerbation is infectious.

Antibiotics are often started automatically, even in the absence of sputum purulence or other signs of bacterial infection. This doesn’t improve outcomes and contributes to resistance and medication-related harm.

Antibiotics are indicated in COPD exacerbations when patients have clinical signs of bacterial infection, particularly increased sputum purulence combined with other cardinal symptoms, prior positive sputum cultures, or require mechanical ventilation.
And when indicated, shorter courses—around five days—are usually enough.

Treat the patient, not the habit.


5. Delaying Noninvasive Ventilation

This is one of the most consequential mistakes.

Patients with acute hypercapnic respiratory failure are sometimes left on oxygen alone for too long. Rising CO₂ and falling pH should trigger early action—not watchful waiting.

Early noninvasive ventilation reduces intubation rates, shortens ICU stays, and improves survival. Delaying it often means losing the window where it could have prevented invasive ventilation altogether.

Oxygen alone is not enough when ventilation is failing.


6. Poor Discharge Planning

Many COPD admissions fail after discharge.

Patients leave the hospital without proper inhaler technique education, without a written action plan, and without timely follow-up. The result is predictable: poor adherence and high readmission rates.

A few minutes spent reviewing inhaler technique, reinforcing warning signs, and arranging follow-up within a few weeks can dramatically change outcomes.

Discharge is part of treatment—not an afterthought.


Final Thought

COPD exacerbations don’t fail because we lack effective therapies.

They fail because of oxygen overuse, delayed bronchodilators, excessive steroids, unnecessary antibiotics, missed noninvasive ventilation, and poor transitions of care.

Fixing these mistakes doesn’t require new drugs or complex protocols—just disciplined, thoughtful medicine.

And that’s still very much our job.

Adobe Express Photo project-2 (2)

Hepatic Encephalopathy: 5 Errors That Prolong Hospital Stays

You have a Grade III encephalopathy patient. You’ve started the Lactulose, and you’re waiting. But 48 hours later, they are still incoherent! Sounds like a commonly encountered scenario!

Hepatic encephalopathy is a topic that seems everyone thinks they know how to manage, yet many fall into one or more of these traps.

Mistake 1: Treating the Ammonia Number Instead of the Patient

An elevated serum ammonia level without clinical signs of HE is NOT an indication for treatment. HE is a clinical, not a lab diagnosis.

Quite often, I see ammonia is ordered in the ED, it comes back elevated, and lactulose is automatically ordered despite the lack of any symptoms or signs to suggest encephalopathy.

The American Association for the Study of Liver Diseases (AASLD) specifically advises against routine ammonia measurement for diagnosis or trending response to treatment of hepatic encephalopathy, as ammonia levels are variable within patients and laboratories, lack sensitivity and specificity, and rarely alter management in cirrhotics.

Instead, assess for signs and symptoms suggestive of hepatic encephalopathy in patients with chronic liver disease:

  • Grade I: sleep reversal/behavior change
  • Grade II: lethargy, confusion
  • Grade III: stupor, incoherent, arousable
  • Grade IV: coma

Importantly, these symptoms in patients without chronic liver disease or portosystemic shunting do not constitute hepatic encephalopathy and require an alternative diagnostic evaluation.

Mistake 2: The “Protein Starvation” Error

Patients with cirrhosis are often malnourished, and protein restrictions are associated with increased mortality, so patients with hepatic encephalopathy should generally not have their protein intake restricted. Patients with mild to moderate hepatic encephalopathy can typically take nutrition orally.

Patients with severe hepatic encephalopathy usually do not receive oral nutrition, but as soon as they improve, a standard diet can be given. Patients should be instructed to eat small meals throughout the day, with a late-night snack of complex carbohydrates, because fasting results in the production of glucose from amino acids, leading to the production of ammonia.

Mistake 3: Missing the “Precipitants” (The Trigger)

This is the single most common reason patients fail to improve despite adequate lactulose. Treatment of precipitating causes combined with pharmacologic therapy is typically associated with prompt improvement in mental status and hepatic encephalopathy.

Here is a high-yield precipitant checklist:

  • GI bleeding
  • Infection (SBP, UTI, pneumonia, etc.)
  • Hypovolemia/dehydration from overdiuresis or other causes.
  • Renal failure
  • Constipation
  • Electrolytes: hypokalemia + metabolic alkalosis
  • Hypoxia
  • Hypoglycemia
  • Sedatives/benzos
  • Rare: HCC, portal/hepatic vein thrombosis

Prompt identification and aggressive treatment of precipitating factors is essential; failure to do so delays clinical response.

Mistake 4: Poor Lactulose Titration

The goal of lactulose or other nonabsorbable disaccharides, such as lactitol, is to achieve two to three soft stools per day without diarrhea (Diarrhea can worsen hepatic encephalopathy, as it can lead to dehydration and hypokalemia). So titare up and down to achieve this goal.

Lactulose and lactitol act through a variety of mechanisms that lead to decreased absorption of ammonia from the gastrointestinal tract.

The typical dose of oral lactulose is 30 to 45 mL (20 to 30 grams), two to four times per day. An equivalent dose of lactitol is approximately 30 to 60 grams (powder), diluted according to the label (eg, in 100 mL of water), given orally in two to four divided doses per day.

Lactulose enemas can be given if the patient cannot take it orally. We mix 300 ml of lactulose with 700 ml of tap water or saline given as a 30-60-minute retention enema every 4-8 hours/day until the patient can take PO. Rectal tube isn’t required to administer lactulose enema, as it may cause discomfort, rectal irritation, and potential injury to the rectal mucosa.

In cases of severe leakage in patients with severe fecal incontinence or inability to retain the enema solution, or in cases where prolonged retention of the enema solution is necessary, a rectal tube can be used.

We do not administer therapy by nasogastric tube because of the risk of aspiration.

Mistake 5: The “Wait and See” with Rifaximin

Rifaximin was approved as an add-on therapy to lactulose for secondary prophylaxis of overt HE. It is never a standalone treatment. In Acute HE, it isn’t a first-line treatment but should be added if there is no clinical improvement within 48 hours of treatment with lactulose or lactitol. If the patient is already on rifaximine at home, we must continue that.

The standard dose of rifaximine is 550 mg PO BID.


Bonus

Lactulose is recommended as chronic therapy for all patients with cirrhosis who have experienced at least one episode of overt hepatic encephalopathy (OHE) for secondary prophylaxis, and rifaximin should be added if there is recurrence or intolerance to lactulose.

WhatsApp Image 2025-11-13 at 12.35.37 AM

Central Venous Access: What You Need to Know Before Starting Inpatient Rotations

1. Peripheral vs Central Access

Peripheral access:

Includes short peripheral IVs (<6 cm) and midlines (8–20 cm).

  • Peripheral IVs: Inserted in hand or forearm veins for short-term use (3–5 days). Use feet only when upper extremity access isn’t possible.
  • Midlines: Placed in larger upper-arm veins for 1–4 weeks (up to 30 days max). They’re more durable but don’t reach central circulation.

Central access:

Catheters with the tip in central veins, classified as:

  • Non-tunneled Centrally inserted CVC:
    • These include internal jugular, subclavian, and femoral central lines.
    • They are used for short-term access — usually less than two weeks.
    • Subclavian is preferred for short-term use because it’s more comfortable and has a lower infection risk, but we avoid subclavian lines in CKD or ESRD patients because they can cause venous stenosis and compromise future dialysis access.
    • Femoral central lines should be reserved for emergencies or when the internal jugular or subclavian sites aren’t possible.

Two special types of non-tunneled central lines deserve mention:

  1. Temporary dialysis catheters: These are large-bore central lines used when a patient needs urgent dialysis or CRRT. They’re usually placed in the right internal jugular or femoral vein if IJ access isn’t possible. If the need for dialysis becomes long-term, these should be transitioned to a tunneled dialysis catheter, like a Permacath.
  2. Cordis — also called an “introducer sheath”: This is a short, large-bore central line that provides rapid access to the central circulation.
    It’s used when we need fast fluid resuscitation, multiple infusions, or when placing a Swan-Ganz catheter in the ICU or OR. Cordis lines are meant for very short-term use — usually hours to a few days.


  • PICC line (Peripherally inserted central catheter): These catheters re placed in the arm and their tips end in the superior vena cava. Can stay for weeks–months (up to 6) for prolonged IV therapy, TPN, chemo.
  • Tunneled CVC (Hickman, Permacath): These are designed for long-term and frequent access — They run under the skin before entering the vein, which helps reduce infection risk. They’re commonly used for dialysis, parenteral nutrition, and ongoing chemotherapy.
  • Implanted Port (Port-a-Cath): These are fully under the skin. They’re accessed only when needed, require very little day-to-day care, and can last for years — often permanently — when maintained well.

2. Venous Accesses Ranking

By invasiveness from least to most:

Peripheral IV → Midline → PICC → Non-tunneled CVC → Tunneled CVC → Implanted Port

By duration:

Peripheral IV (3–7 days) → Non-tunneled CVC (days–3 weeks) → Midline (1–4 weeks) → PICC (weeks–months) → Tunneled (months–years) → Port (>5 years)

By infection risk (lowest to highest):

Port ≈ Peripheral IV → Midline → Tunneled → PICC → Non-tunneled (Femoral highest)

By thrombosis risk (highest to lowest):

Subclavian (long-term) → PICC → Femoral → Port → Tunneled/IJ → Midline → Peripheral IV

By phlebitis risk (highest to lowest):

Peripheral IV → Midline → PICC → Others (minimal)


3. Choosing the Right Access

Always start with the least invasive line that meets your patient’s needs.

  • Peripheral IV:
    • Default choice; suitable for most short-term infusions (including vasopressors, hypertonic saline, amiodarone ≤24h).
    • Use 18–20G or larger, and monitor closely.
    • If peripheral access fails → use ultrasound-guided IVmidlineCVC, or IO access based on context.

If the patient already has a functioning line (PICC, port, tunneled CVC), use it unless it’s infected or incompatible.

  • Midline: Ideal for 1–4 weeks of non-vesicant therapy (e.g., 2-week IV antibiotics for MSSA).
  • PICC: Use for > 4-week therapy, TPN, or multiple infusions.
  • Non-tunneled CVC: For critical illness, RRT, TPN, or multiple drips.
    • Subclavian preferred short-term (except in CKD/ESRD).
    • Right IJ is preferred in CKD.
    • Femoral: emergencies only.
  • Tunneled & Ports: For long-term access (HD, chemo, TPN). Ports for intermittent use, tunneled for continuous.

4. Contraindications

  • Avoid limb placement (peripheral/midline/PICC) if:
    • Prior mastectomy/axillary node dissection
    • AV fistula/graft
    • DVT, severe venous obstruction
    • Infection, burn, wound, or prior radiation
  • Avoid placing central lines at:
    • Infected or distorted insertion site
    • Ipsilateral chest tube, ICD, or pacemaker
    • Vein thrombosis or occlusion
  • Special cases:
    • Coagulopathy: Safe if platelets ≥20K and INR ≤2. Use ultrasound.
      • 10–20K → transfuse one platelet unit if noncompressible site.
      • INR 2 → correct to ≤2 before placement.
    • Bacteremia:
      • Safe to place a new non-tunneled CVC if no existing catheter.
      • Avoid inserting new CVC if another one is present—remove the first one if it’s the suspected source (especially with S. aureusCandida, or GNRs).
      • Do not place a tunneled or port until bacteremia clears.

5. Daily Care and Removal

  • Ask daily: Does this patient still need the line?”
  • Inspect daily:
    • Site: redness, pain, drainage
    • Dressing: clean, dry, intact
    • Catheter: secured, correct external length
  • Maintenance:
    • Flush before/after meds; unused lumens daily
    • Change transparent dressings q7 days; gauze q2 days
    • Confirm tip placement (CXR or ECG-guided)
  • Remove immediately if:
    • No longer needed
    • Suspected infection
    • Nonfunctional or malpositioned
  • During removal:
    • Supine/Trendelenburg, have the patient hold breath/Valsalva, steady traction, occlusive dressing afterward.
    • If infection is suspected, culture the catheter tip.

6. Common Complications

  • CLABSI:
    • Prevent with full sterile barrier, chlorhexidine prep, daily necessity checks, hub scrubbing, and prompt removal.
    • Suspect if fever or positive cultures >48h after insertion.
    • Draw cultures (line + peripheral), remove line, start empiric antibiotics.
  • Thrombosis:
    • Most common with PICCs/subclavian lines.
    • Arm/neck swelling, pain, venous distention → confirm by ultrasound.
    • Treat with anticoagulation; remove only if infected or unnecessary.
  • Mechanical Issues:
    • Pneumothorax: Get CXR post-subclavian or IJ.
    • Arterial puncture: Remove immediately, apply pressure for 10–15 minutes.
    • Air embolism: Trendelenburg + left lateral position, 100% O₂.
    • Malposition: Confirm and reposition before use.
  • Catheter Dysfunction:
    • If sluggish or occluded → reposition, flush gently, or use Cathflo (2 mg, dwell 30–120 min).
    • Never force flush.

Special Scenarios

  • CKD/ESRD: Avoid subclavian & PICCs; preserve future fistula veins.
  • Cancer: Prefer ports for long-term intermittent therapy.
  • Home IV therapy: PICCs are ideal—ensure patient education and home nursing follow-up.

Summary & Key Takeaways

  • Start with the least invasive option.
  • Midlines are underused—great for 1–4 weeks of therapy.
  • PICC lines for long-term or outpatient IV therapy.
  • Non-tunneled CVCs for emergencies and ICU patients.
  • Remove lines early to prevent CLABSI.
  • Avoid subclavian in CKD.
  • Always confirm tip position before use.
NGTPEG

NG Tube : 5 Things to know before your hospital rotations


Key Takeaways at a Glance

(For those who just need the pearls — read this first!)

  • NGT = short termPEG = long term — NGTs are for ≤ 4–6 weeks; PEGs for prolonged enteral feeding.
  • Use NGT for dysphagia, mechanical ventilation, nutritional failure, or gastric decompression.
  • Absolute contraindications: facial trauma for NGT; ascites / peritonitis for PEG.
  • Relative cautions: recent GI bleed or cirrhosis with varices → use soft, small-bore tubes.
  • Always confirm placement by X-ray before first use — bedside checks alone aren’t enough.
  • Prevent aspiration: keep HOB 30–45°, use continuous pump feeds when possible.
  • Skip routine residual checks — focus on clinical intolerance (nausea, distension, vomiting).
  • If GRV > 500 mL: hold 2 hrs → reassess → if persists w/o intolerance, restart slower + prokinetic; if intolerance, continue hold + recheck in 2–4 hrs.
  • PEG dislodgement < 4 wks = emergency; ≥ 4 wks: replace bedside with Foley temporarily.
  • Prevent clogs: flush before / after meds + feeds, avoid mixing drugs, use warm water ± enzymes if blocked.

Introduction

An NGT, or nasogastric tube, is a flexible tube inserted through the nose, down the esophagus, and into the stomach, and sometimes down to the jejunum, also known as NJ tubes.

A gastrostomy tube is inserted directly through the abdominal wall into the stomach. The term PEG tube is often used to refer to any type of gastrostomy tube, though it technically describes those placed endoscopically (Percutaneous Endoscopic Gastrostomy). So from now on, PEG means all kinds of gastrostomy tubes.

Both deliver nutrition and medications, but the key difference is duration and invasiveness: NGTs are temporary, typically used for no longer than 4-6 weeks, while PEG tubes are meant for long-term feeding, usually more than four to six weeks, and allow patients greater comfort and mobility.

When should we consider NG tube placement in our patients?

Think about placing NGT tubes in the following situations:

  • Patients who can’t safely swallow and need medication and nutrition administration, such as mechanically ventilated patients, severe stroke patients, or any other reason.
  • Patients who need nutritional support when they cannot meet their caloric requirements through oral intake.
  • Patients who need gastric decompression for bowel obstruction or ileus.

NGT is a short term solution for up to 4-6 weeks, if the patient needs enteral support beyond this timeframe, it’s time to consider transitioning to a PEG tube.

PEG tubes are our go-to for long-term feeding—anything beyond four to six weeks. This includes:

  • Patients requiring prolonged mechanical ventilation who need to be transitioned to tracheostomy
  • Patients with prolonged dysphagia from neurological conditions like ALS, advanced dementia, or severe stroke.
  • It’s also indicated for head and neck cancer patients requiring radiation therapy, when we know they’ll need supplemental nutrition for more than four to six weeks.
  • And finally, when patients are heading home, and will need continued enteral feeding support.

Precautions and contraindications

  • NGTs are safe to place in most patients, and the absolute contraindications are limited. NGT placement is contraindicated in cases of facial trauma, nasal injury, abnormal nasal anatomy, or preexisting sinusitis. OGT (oral gastric tubes) can be alternatively considered in sedated patients, as it’s very uncomfortable to place in awake patients..
  • Patients with recent GI bleed (especially peptic ulcer with a visible vessel) are considered a relative contraindication. Gastroenterology should be consulted if an NGT is absolutely necessary here!
  • How about patients with liver cirrhosis? This is a frequently encountered situation! NG/OG tube placement is not absolutely contraindicated in cirrhotic patients! But, there is, of course, a higher risk of gastrointestinal bleeding, particularly in those with esophageal varices, particularly within 48 hours of NG tube placement. So, enteric tube placement should be considered only after failure of oral supplementation, and close monitoring for bleeding is warranted.
  • Percutaneous gastrostomy is strongly contraindicated:
    • in cirrhosis with ascites, due to high complication and mortality rates.
    • Active peritonitis, bowel ischemia, or mechanical intestinal obstruction. 

Massive ascites and morbid obesity with a large panniculus are also recognized as major barriers to safe PEG placement.


Tube feeding system

NGT tubes come in different sizes, measured in French units. Common sizes range from 8 to 18 French. Smaller bore tubes, like 8-10 French, are more comfortable for patients and used primarily for feeding, while larger bore tubes, like 14-18 French, are used for gastric decompression. The tubes have depth markings along their length to help confirm proper positioning.

One of the most commonly used NGTs is the Salem sump tubes; these are large-bore tubes used mainly for gastric decompression and suction, featuring a double lumen with a blue vent to prevent mucosal damage.

The Dubhoff tube is a small-bore nasogastric feeding tube that is thinner and more flexible than standard nasogastric tubes, typically measuring 8-12 French in diameter. The tube features a weighted tungsten tip that helps it navigate through the gastrointestinal tract.


Choose small-bore soft tubes for nutrition and medication administration.

Choose large-bore, more rigid tubes for suction and gastric decompression.


In high-risk patients, such as liver cirrhosis or recent GI bleed, small-bore soft tubes are preferred and should be gently inserted.


PEG tubes consist of several parts: an external bolster or bumper that sits against the abdominal wall, a long tube shaft, an internal bumper that sits against the stomach wall, and a feeding port with a cap. Some PEG tubes have a balloon instead of an internal bumper. The key is that the tube creates a stable tract between the stomach and skin.

Gastrostomy tubes can be placed endoscopically (PEG), surgically, or by interventional radiology; as we said earlier, the term ‘PEG tube’ specifically refers to tubes placed by the endoscopic technique, but is commonly used for all.

PEG tube


Modern feeding systems include gravity bags, pump-controlled systems, and bolus syringes. Pump-controlled feeding is preferred for continuous feeds as it provides consistent delivery rates and reduces aspiration risk compared to gravity feeding.

NGT positioning confirmation

For NGT tubes, the gold standard is a chest X-ray showing the tube tip in the stomach, below the diaphragm, bisecting the carina. Bedside methods like pH testing and air insufflation are supplementary but should never replace X-ray confirmation for initial placement

Never use an NGT without X-ray confirmation

X-ray showing the tube tip in the stomach, below the diaphragm, bisecting the carina.


In this X-ray, the NGT tip is coiled in the esophagus and hasn’t entered the stomach; this needs repositioning


The X-ray shows that NGT has been inadvertently placed into the right mainstem bronchus.

For PEG tubes, we typically start using them within a few hours of insertion. In practice, we must get the okay from the physician who performed the procedure before using it. We must also inspect the site for proper positioning of the external bumper; it should sit flush against the skin but not too tight, as excessive tension causes pressure necrosis, while too much slack allows leakage.

A healthy PEG site with appropriate positioning.


This image shows buried bumper syndrome, where the internal bumper has migrated into the gastric wall, causing pain and feeding intolerance.

The daily bedside checks when rounding on patients with feeding tubes

  • Take all the necessary steps to minimize aspiration risk. Both NGT and PEG tubes carry aspiration risk, though PEG tubes generally have a lower risk of aspiration and aspiration pneumonia:
    • Maintain the head-of-bed (HOB) elevation at 30–45 degrees during and after feeding and avoid supine positioning whenever possible.
    • Pump-assisted continuous feeding is preferred over gravity or bolus feeds.
    • In high-risk patients such as those with previous aspiration or gastroparesis, post-pyloric or jejunal placement should be considered.
  • Inspect the insertion site for NGT/PEG:
    • Check the nares for pressure ulcers, and ensure the tube is secured properly at the correct depth marking.
    • For PEG: assess for redness, drainage, odor, or signs of infection. The site should be clean and dry. Also assess the pain or discomfort at the site.
  • Next, evaluate the patient’s tolerance: any nausea, vomiting, abdominal distension, or diarrhea? These suggest feeding intolerance.
  • Nurses routinely assess tube patency by gently flushing with water. Tubes should be flushed with 30 mL of water before and after each feeding or medication administration. If resistance is met, the tube may be clogged.

Routine residual checks in continuous feeds are no longer recommended except in select cases (e.g., high risk for intolerance or if it’s still part of the ICU protocols).

Tube maintenance and troubleshooting

For NGT

  • Clogged tubes are the most frequent issue. Prevention is key here: Flush with water regularly, crush medications, and never mix medications. If clogging occurs, try warm water flushes first. Pancreatic enzymes mixed with sodium bicarbonate can be used for stubborn clogs, but never use force, which can rupture the tube.
  • Tube migration or dislodgment needs immediate attention. For NGT, if the tube is pulled out partially, never advance it blindly; remove it completely and replace it with radiographic confirmation.

For PEG tubes

If the tube falls out within the first four weeks before the tract matures, this is an emergency requiring immediate replacement, ideally within hours, as the tract closes rapidly. After four weeks, the tube can be replaced at the bedside with a Foley catheter temporarily until a new PEG tube is placed.


Residual volume troubleshooting (If you decided to check residual volume in continuous feed)


Remember that metoclopramide and erythromycin can be given every 6 hours as needed and remember that both can prolong QTc.

If intolerance persists despite prokinetics, switch to post-pyloric feeding


PEG site infections

Mild cellulitis around the site responds to oral antibiotics and local care. Severe infections, abscess formation, or necrotizing fasciitis require surgical consultation.

Buried bumper syndrome

presents with feeding intolerance, pain, and difficulty flushing. This requires endoscopic or surgical intervention to reposition or replace the tube.

WhatsApp Image 2025-10-09 at 2.03.43 AM (1)

Chest Tubes & Pigtails: 5 Must-Know Tips for ICU Rotation

Introduction

  • A chest tube is a hollow, flexible tube that we place into the pleural space to drain air, blood, or fluid so the lung can re-expand.
  • A pigtail catheter is simply a smaller, softer version of a chest tube, with a curled ‘pigtail’ tip.
  • Both do the same job — removing air or fluid from around the lung — but the big difference is in size and invasiveness.

Indications

This table summarizes the indications of the traditional chest tube vs the pigtail catheter

The chest tube drainage unit

An adequate chest drainage system aims to:

  1. Remove pleural fluid and/or air.
  2. prevent their reflux into the pleural space.
  3. Restore negative pleural pressure (less than atmospheric pressure) to allow lung re-expansion.

To understand how the chest tube achieves that, we must understand the components of the chest tube drainage unit.

The one-bottle unit

Back in the day, the chest tube unit was simply a tube connected to a bottle filled with saline/water and a one-way valve. While this works well for draining air, it doesn’t for fluid! If a pleural effusion is drained, the fluid level in the bottle will quickly increase, reducing the efficiency of removing additional fluid from the patient

The two-bottle unit


To solve this problem, a second water seal bottle was introduced! This leaves the first bottle for collection only and one for the water seal.

To understand the water seal, try blowing some air in a cup of water. You see all these bubbles; can you suck that air back? Of course, you can’t! The air gets sealed in the water.

The three-bottle system

To improve drainage efficiency, a third bottle connected to external suction is added. a collection bottle, a water seal bottle, and a suction bottle.

The modern chest tube unit

Nowadays, all these bottles/chambers are currently integrated into a single modern, multifunctional, easy-to-manage unit.

The collection chamber, the water seal chamber, and the suction chamber. Notice the air leak monitor!


The tube itself comes in different sizes and shapes. They can be straight, angled, spiral, or coiled at the end (referred to as “pig-tail”).

Confirmation of proper positioning with CXR

  • Ideally, the tip of the chest tube should be positioned at the apex if inserted for pneumothorax, and at the base if inserted for fluid removal. Ensure the tip is not outside the pleural space or abutting the mediastinum.
A chest tube was inserted for pneumothorax and is in good position toward the apex.
A pigtail catheter at the lung base draining fluids


A pigtail is abutting against the mediastinum and should be pulled back


One of the chest tube fenestrations is outside the pleural space! It should be inside.


The fenestrations seen on chest tubes are these evenly spaced gaps (interruption marks) along the radiopaque stripe of the tube. The fenestrations should be inside the pleural space to allow effective drainage of air or fluid while reducing the risk of clogging or blockage. Multiple holes also distribute suction evenly, preventing tissue trauma and ensuring continuous tube function.

The daily bedside checks on patients with chest tubes

  1. Review the CXR first.

Although a daily CXR isn’t necessary in patients with chest tubes who are stable, it must be obtained if there is a change in the patient’s clinical status, after major adjustments, repositioning, or removal of the chest tube, or if there is a persistent air leak or fluid drainage.


  1. Assess the output in the collection compartment. Is it bloody or not? Is it increasing or decreasing?
  2. Check for tidaling! Tidaling is the rise and fall of fluid in the water seal chamber with breathing. Watch this YouTube video showing tidaling!


Tidaling tells you the chest tube is working and still in contact with the pleural space. If tidaling disappears, it means one of two things:

  • The lung has fully re-expanded — which is good —
  • The tube is blocked — which is bad —

If the patient’s breathing comfortably, chest X-ray shows full lung expansion, and there are no signs of distress — that’s good. But if the patient is short of breath, there’s new subcutaneous emphysema, or the tube is kinked or clogged — that’s bad, it means obstruction.

  1. Check for bubbling! Do you see any air bubbles in the air leak monitor? Check bubbles in the air leak monitor in this YouTube video:


Bubbling means air is still escaping. It could be from an ongoing air leak in the pleural space or a disconnection in the tubing outside the chest.

Never clamp a chest tube if bubbling is present, please! If you do, tension pneumothorax can develop quickly.

  1. Check the dressing and assess the tube integrity from the dressing to the tube unit, particularly if you see a continuous bubbling in the air leak monitor.
  2. Assess the Pain level! Chest tubes, especially large-bore ones, are painful, so please ensure adequate pain control.
  3. Ask them to ambulate. Chest tubes don’t mean they can’t be ambulated.
  4. Do they still need the chest tube?


Chest tube removal

The chest tube should only be removed by the team that placed and is actively managing it. Typically, the ICU, thoracic, cardiovascular, or trauma surgery team.

Removal is considered when:

  • The active issue has been resolved, whether fluid or air.
  • The lung has fully expanded.
  • The patient is clinically stable.

For example, in cases of draining fluid, the amount in the collection compartment is consistently low; something like less than 20 cc/day for 1-2 days.

And for pneumothorax, you don’t see any air bubbles in the air leak monitor for 1-2 days, and the lung has fully expanded.

Typically chest tube is clamped for 12-24 hours (clamping deems the tube not functioning). If the patient’s conditions remained clinically stable with a stable CXR, then this means it’s time to remove the tube.

DO NOT CLAMP CHEST TUBE on your own unless you are part of the team who is actively managing it. DO NOT EVER CLAMP A TUBE IF YOU SEE AIR BUBBLES IN THE AIR LEAK MONITOR!


Some patients may need the chest tube for weeks and months, like malignant effusions. In such a case, a traditional chest tube can be replaced with a pigtail catheter to go home with.


Pitfalls & Warnings

  • Don’t connect the chest tube to suction immediately after insertion to reduce the risk of re-expansion pulmonary edema. Re-expansion pulmonary edema is a non-cardiogenic edema that happens when a lung that’s been collapsed for days is rapidly reinflated — the fragile capillaries leak, flooding the alveoli. Management is supportive with oxygen, noninvasive ventilation, and cautious fluids. The real key is prevention: never drain too much, too fast.

Diuretics may worsen hypovolemia and are not recommended. The re-expansion pulmonary a non-cardiogenic edema driven by increased capillary permeability from reperfusion injury, not by fluid overload


  • Watch for a blocked/clogged tube (no drainage but effusion enlarging). Sometimes, a thrombolytic is used for clogged tubes!
  • Correct any tube kinking or dislodgment.
Gemini_Generated_Image_gr4uwgr4uwgr4uwg

How to manage acute pain in inpatient settings

Introduction

I can’t remember the last time I finished a shift without a call about a patient in acute pain. In this post, I’ll share a practical, easy-to-use guide to help you choose the right analgesia for your patients.

Pain severity scale

The first and most important step—often overlooked—is to assess the severity of pain using a standardized pain scale. In the hospital, this is typically a numerical rating scale, where patients are asked to rate their pain from 0 to 10. A score greater than 6 is generally considered severe.

Mild pain

This is pretty straightforward. Oral acetaminophen alone or in combination with a low-dose oral NSAID can be used. An ideal mild pain regimen would consist of:

  • Acetaminophen 650 mg orally every 4 hours as needed.
  • Ibuprofen 400 mg orally every 4 hours as needed.

The nurse should administer either option, but not both at the same time. They may alternate between the two if needed.

Personally, I prefer the sole use of acetaminophen in the mild pain category.


Moderate pain

A high-dose Oral NSAID with or without low-dose IV acetaminophen.

IV NSAIDs are an option here, as well. In such a case, oral NSAIDs should be discontinued. An ideal regimen would consist of:

  • An NSAID (Pick one):
    • Naproxen 500 mg orally twice daily as needed.
    • Ibuprofen 600 mg orally every 6 hours, or Ibuprofen 800 mg orally every 8 hours as needed.
    • Ketorolac 15 mg IV every 6 hours as needed.
  • If NSAIDs are contraindicated or inadequate, Acetaminophen 650 mg IV every 6 hours as needed can be added.


“Don’t use oral and IV NSAIDs together”


Severe pain

This is the category where opioids should be used! Opioids should be reserved for severe pain only, including oral & IV opioids! This may seem odd, as a lot of hospital pain protocols include low-dose oral and IV opioids for moderate pain. Please avoid that unless there is a contraindication to use acetaminophen and NSAIDs!

Why am I saying this?

Adding opioids for moderate pain will likely lead to unnecessary and avoidable use of opioids!

Just imagine your patient is having moderate pain based on the assessment scale, and you have the option to pick between a low-dose opioid or an NSAID, most of us will unconsciously lean toward picking the stronger analgesic, which is an opioid here, although a dose of naproxen would have been probably adequate!

So, unless there is a contraindication to use NSAIDs or Acetaminophen, reserve opioids for severe pain only, please.

But does that mean opioids are the only option for severe pain? Of course not!

High-dose IV Acetaminophen and IV NSAIDs are pretty effective in severe pain as well.

So an ideal regimen for severe pain analgesics would consist of:

  • IV Acetaminophen or IV NSAIDs (First line)
  • Oral opioid (Second line)
  • IV opioid (Last to use).

I will go for IV NSAIDs or Acetaminophen first, oral opioids second, and IV opioids are our last resort if the patient’s acute pain remains inadequately controlled

Remember that NSAIDs are first-line analgesics in the following conditions:

  • Renal colic, IV Ketorolac in particular, is effective here.
  • Musculoskeletal pain like arthritis pain, pleuritic-type chest pain, rib fracture, and muscular strains.
  • Incisional post-operative pain.

Acetaminophen is particularly effective in most types of headaches alone or in combination with caffeine.

Also, the location of pain may warrant analgesia avoidance, like chest pain of cardiac origin, where NTG should be used instead.

Now, which opioid should we use and what dose? I refer you to an older post where I discussed the use of opioids. You can read it here


Persistent severe pain

In persistent severe pain where the patient keeps requiring recurrent doses of opioids despite treating or while treating the underlying cause of pain, we need to try to reduce the pain level with other means and consequently reduce the need for IV opioids:

  • Adding scheduled (Not PRN) oral acetaminophen or oral NSAID, remember to discontinue their IV equivalents.
  • Adding Gabapentin
  • Adding a scheduled low-dose oral opioid can be considered if previous measures didn’t help reduce the use of IV opioids.


Let me give you an example:

A 64-year-old lady was admitted with a pelvic fracture, she’s in severe pain her severe pain regimen consists of the following:

  • Ketocorolac 15 mg IV every 6 hours as needed
  • Oxycodone/acetaminophen 5/325 mg PO every 4 hours as needed
  • Morphine 4 mg IV every 6 hours as needed

You reviewed her chart and found that she received 12 doses of IV morphine over the last three days, her nurse reported that IV morphine is the only thing keeping her pain under control and she asked you if there’s anything we could do to help her pain control.

Of course, the first thing I do is check if the patient has received IV Ketorolac and oxycodone/acetaminophen or if the nurse just jumped to IV morphine, if they have not been tried, I will ask the nurse to try them first and assess the response! If they have already been given with inadequate response, then we can do the following:

  • Add scheduled high-dose oral ibuprofen, or naproxen, or acetaminophen
  • Add Gabapentin
  • If that remains inadequate, we add a scheduled oral opioid for a few days while escalating the Gabapentin dose


Please remember this about the use of Acetaminophen and NSAIDs:

  • Don’t combine oral and IV forms of the same medication or the same class within the same severity category, for example, don’t use oral naproxen and IV ketorolac together for moderate pain, or oral acetaminophen and IV acetaminophen together for severe pain.
  • Combining acetaminophen at doses higher than 2 g/day together with an NSAID isn’t more effective than an NSAID alone and might be associated with a higher risk of gastrointestinal complications! So keep that in mind!
  • The total daily amount of acetaminophen shouldn’t exceed 4 g/day including all forms of acetaminophen, whether oral or IV, and the one combined with oral opioids.

More options for severe pain

There are other options to consider in severe pain cases:

  • Regional block performed by surgery or anesthesia can be helpful in rib fractures or postoperative pain
  • Ketamine can be considered in severe pain refractory to opioids.
  • Dexamethasone can be considered where swelling and edema are suspected as a contributing factor to the pain line in disk herniation or metastatic bone pain.
  • Local anesthetics like lidocaine patches are not that effective in acute severe pain management, but they can be used as an adjuvant therapy to other analgesics for superficial musculoskeletal pain.
  • Muscle relaxants can be considered when muscle spasms may contribute to the patient’s acute pain


WhatsApp Image 2025-09-10 at 10.17.54 AM

The top five antibiotics I use in the ICU

In this post, I will share when to use them, how to use them, what to monitor, and their alternatives:

  • In the ICU, I reach for IV vancomycin when MRSA or resistant gram-positives are a concern — like sepsis of unknown source, ventilator pneumonia, line infections, or resistant Strep pneumo meningitis. It’s my go-to until cultures guide me otherwise, with close drug monitoring and quick de-escalation when I can.
  • The initial loading dose is 20-35 mg/kg, based on actual body weight, and should not exceed 3,000 mg. So, for a 70 kg patient, it’s roughly 1.5-2 gm. Do not renally adjust for the loading dose!
  • Subsequent dosing is guided by the area under the concentration-time curve to minimum inhibitory concentration ratio (AUC/MIC), not by trough-only monitoring. Fortunately, our pharmacists take care of that.
  • Vancomycin can cause nephrotoxicity and agranulocytosis, which is why we monitor kidney function and CBC while on IV vancomycin.
  • Vancomycin infusion reaction (previously “Red man syndrome”) occurs with IV administration. It’s a side effect, not a true allergy. Manage by slowing the infusion rate to 50% or 10 mg/min (whichever is slower). Diphenhydramine plus famotidine effectively relieves symptoms. Stop infusion only for hypotension, chest pain, dyspnea, or muscle spasms; restart at reduced rate when resolved.
  • Remember that Oral vancomycin is solely used for C. diff treatment.


If I can’t use IV vancomycin because of allergy or toxicity, Linezolid and daptomycin are the main alternatives, and the source of infection dictates which is better to pick:

  • Linezolid → preferred for lung, CNS, and skin/soft tissue infections. Easy, weight-independent dosing, 100% oral bioavailability, and safe in renal failure. But it’s bacteriostatic, not ideal for bacteremia, and can’t be combined with serotonergic drugs due to serotonin syndrome risk. Limit use to ≤28 days because of thrombocytopenia, neuropathy, and myelosuppression.
  • Daptomycin → preferred for bloodstream infections, endocarditis, and other deep-seated infections (MRSA or VRE). Bactericidal, but weight-based and requires renal adjustment. Never use it in pneumonia — it’s inactivated by surfactant. Rhabdomyolysis and eosinophilic pneumonia are potential serious side effects of daptomycin.
  • Ceftaroline → the only β-lactam with MRSA activity. I reach for it when linezolid or daptomycin can’t be used or when the vancomycin MIC is elevated (≥2 μg/mL). It’s useful for pneumonia and bacteremia, but requires renal dose adjustment.


Linezolid vs Daptomycin vs Ceftaroline


(2) Cefepime

  • I reach for cefepime when broad-spectrum coverage of Gram-negative and Gram-positive bacteria is required, such as in suspected hospital-acquired or ventilator-associated pneumonia, and sepsis of unknown source.
  • That’s why you see quite often the combination of vancomycin and Cefepime in initial empiric treatment for severe infection and sepsis. Vancomycin to cover for MRSA and cefepime for the rest, including Pseudomonas. Cefepime lacks anaerobic coverage, and metronidazole should be added if anaerobic coverage is required.
  • Cefepime has good CNS penetration and can be used to treat CNS infections.
  • Cefepime isn’t effective against extended-spectrum beta-lactamase (ESBL) producing organisms, regardless of culture and susceptibility results. Use carbapenems instead for that.
  • Dosing is 1-2 gm IV every 8-12 hours and should be adjusted to renal function.
  • Monitor mental status to detect cefepime neurotoxicity early. Neurotoxicity in the form of encephalopathy, confusion, hallucinations, stupor, coma, aphasia, myoclonus, seizures, and nonconvulsive status epilepticus can all happen particularly with the use of high doses in patients with renal impairment.
  • If penicillin allergy is reported in the patient’s chart, ask what kind of allergy. Cefepime should only be avoided in patients who report a history of immediate hypersensitivity reactions to penicillins (such as anaphylaxis, angioedema, or urticaria).


(3) Piperacillin/Tazobactam (Zosyn)

  • In the ICU, I reach for Piperacillin/Tazobactam when broad-spectrum coverage of Gram-negativeincluding Pseudomonas, Gram-positive, and anaerobic bacteria is required (No need to add metronidazole).
  • It was widely used in combination with vancomycin for the initial empiric antibiotic coverage for severe infections until it was found that this combination increases the risk of AKI! Since then, it has been largely replaced by cefepime.
  • It has poor CNS penetration and shouldn’t be used for CNS infections.
  • Dosing of (piperacillin and tazobactam) is dependent on the type and severity of infection being treated, and it requires renal dosing adjustment.

(4) Meropenem

  • In the ICU, I reach for meropenem when ESBL-producing organisms are suspected, or when cefepime and piperacillin/tazobactam can’t be used due to a serious allergy.
  • It covers Gram negatives, Gram positives, and anaerobes, and it has excellent CNS penetration, making it suitable for CNS infections.
  • It has a very low cross reactivity with penicillin’s making it a great alternative in patients with serious penicillin allergy, even in those with a history of immediate hypersensitivity reactions (such as anaphylaxis, angioedema, or urticaria).
  • Among carbapenems, ertapenem lacks pseudomonal coverage.


Cefepime vs Piperacillin/tazobactam vs Meropenem


(5) Bactrim (Trimethoprim–sulfamethoxazole)

  • The reason I include it here because it’s the antibiotic of choice to resort to when thinking about PJP pneumonia, Nocardia, and in the treatment of stenotrophomonas maltophilia, an opportunistic gram-negative bacillus that is a common culprit in hospital-acquired infections in critically ill patients.
  • Dosing is weight-based. The IV preparation of Bactrim entails the use of a large volume of dextrose solution to mix with, so watch for the risk of hyponatremia.
  • Renal adjustment is required; we need to closely monitor CBC, kidney function, and electrolytes as hyperkalemia, bone marrow suppression, and hyponatremia are all potential side effects of Bactrim.
  • Allergy to nonantibiotic sulfas isn’t a contraindication to use sulfa antibiotics.

Conclusion

I know there are many other important antibiotics I didn’t cover today. I wanted to keep this post focused and concise. If you’d like a bit deeper practical dive into the antibiotics we use most often in clinical practice, check out my eBook: Antibiotics in Real-Life Clinical Practice: A Pocket Guide for Residents, Hospitalists, Internists, Nurse Practitioners, and Physician Assistants. Check it out here